A great part of our presence at MACRO Museum in Rome was focused on the creation of Come in Cielo Così in Terra, a software-enabled participatory performance through which people can collaborate in drawing constellations onto their cities using their bodies:
- you form groups,
- you choose a constellation,
- each member of the group heads off towards a star (or, more precisely, to the city-location where the star is placed)
- when each star is covered on the map by at least one member of the group: YOU WIN!
- You have actually just collaboratively drawn a constellation onto your city, showing up on the global map.
The application used to perform the workshop is designed completely using HTML, CSS, JavaScript and PHP on the back end: just unzip onto your server online, create a database, update the parameters found in the “db.php” file to reflect your DB configuration and you’re done! You have Come in Cielo Così in Terra on your server.
The application is designed for access through smartphones: just open up the URL using your iPhone or Android and you will be able to start right away.
A couple of things:
- there are bugs: we’ve just started this project and haven’t had time for the righteous tests until now; we will do them in a few days; if you find any bugs/strange behaviors, please do CONTACT US and tell them to us! You will do us a great favor and we will be able to correct issues and distribute updates for the application!
- there is no security in this app! for now this is a proof of concept, so that there is only a minimal registration/login/logout process implemented, with the password in clear on the DB, no email verification, no-nothing; we will replace it soon with a decent authentication model; if you want to go ahead, you can work on the login.php, logout.php and accountManager.php files.
So: just download and install its, or use it FROM HERE and check for updates on Art is Open Source for new releases.
And, as a follow up to the workshop: here are is a basic tutorial on how to make an HTML application which can track users’ positions using only standard features of W3C compliant browsers.
TUTORIAL
What we want to achieve is an application which runs on a user’s web browser (for example Firefox, Chrome or Safari) and:
- asks the uses if he/she would like to have their geographic location taken
- if the user decides to do so, it grabs its geo position
- sends it to a database
- generates a map and shows the user’s position on it
Let’s start.
First step: localize the user
The geolocation API specified by the W3C consortium allows us to do just what we require.
First let’s create a standard, almost empty HTML page.
Then, in the HEAD section, let’s add these lines, to create some javaScript:
If you wrote everything correctly, you can upload this file (save it as an HTML file) to your webserver (if you don’t have a web server anywhere, you can download and install on your computer one of the Bitnami Stacks from here: choose WAMPStack for Windows, LAMPStack for Linux or MAMPStack for OSX).
You can now access your file using your browser (for example, if you installed a Bitnami Stack you can point your browser to http://localhost/the_name_of_your_file.html).
The browser should ask you if you want to be geo-located: if you answer “no” it will pop up an error message, if you answer “yes” it will pop up your geographical coordinates.
This should work consistently on both your computer web browsers and on the web browsers found on your smartphones.
STEP 2 CREATE A DATABASE:
Now we want to store our coordinates somewhere.
So we need to create a database and, inside it, a table to hold them.
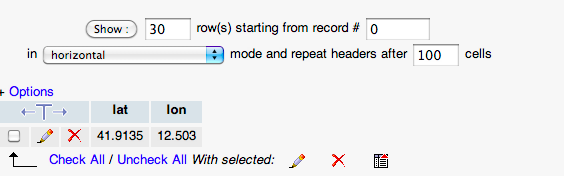
Use the tools you have to manipulate your databases (for example, if you installed the Bitnami stack, you will have the PhpMyAdmin application which you can use through your browser) to create a table (let’s call it “coordinates“) with two FLOAT columns named lat and lon, to hold the coordinates.
Here is what my PhpMyAdmin schema looks like:
the table created for the coordinates
now, let’s create a PHP file (a regular text file, saved with extension “.php”), and let’s save it as “storeCoordinates.php“.
Inside it, let’s write this code:
Put this file on your webserver, as right next to the one we created before.
This file:
- checks that two parameters have been passed in the HTTP request (using the isset command, and the $_REQUEST variable, which contains all parameters which have been passed on by whoever invoked the script)
- if they are present: opens up a database connection (“DB_*” parameters, which you have to configure to reflect your DB’s configuration, and the mysql_connect command)
- prepares an INSERT query in SQL language, concatenating the values for latitude and longitude which we will see in a bit being passed on by our HTML page
- executes using the mysql_query command
THIRD STEP: store coordinates
Now we will modify our HTML file to invoke the functionality we just implemented using PHP.
Download the jQuery library from HERE.
This is a JavaScript library which offers many useful functionalities. We will use some of these.
Save the javascript library file naming it “jquery.js” and upload it to your web server right next to the other files you just created.
Add the following line right after the <head> tag in the HTML file we created in the first step:
This tells the browser to load the jQuery library.
Then modify the updatePosition function we have created in the first step, so that it looks like this:
function updatePosition(currentPosition){
$.getJSON("storeCoordinates.php",
{
lat: currentPosition.coords.latitude,
lon: currentPosition.coords.longitude
}
);
}
What we are doing with the getJSON command is to call the storeCoordinates PHP file we created earlier on and pass to it the coordinates we just captured.
THAT’S IT!
Just update the file you just modified on your web server (so, in the same folder used by the web server there should be the HTML file together with the jquery.js file and the storeCoordinates.php file.
If you navigate to the HTML file using your browser and you answer “yes” when it asks you to be geo-localized, you should see a row being automatically added to your DB, containing your coordinates.
(about accuracy: if you are using this through a web browser, accuracy could not be perfect, as localization will be performed using your network information; this, according to the setup of your provider, will yield results of different degrees of accuracy; the same can be said when using GPS enabled devices: according to where you are, the GPS could provide more or less accurate results)
Here’s my first coordinates automatically captured in this way:
my geo position, finally on the DB
LAST STEP: SHOW’EM ON A MAP!
To show these coordinates on a map, let’s prepare another PHP file to get them from the database and add them to a Google Map. To use Google Maps you have to register and obtain a KEY. Click here to know how to obtain your key (read under the “Obtaining API Key).
Create another PHP file, and call it “map.php“.
Inside it write the following code:
Phew! that’s quite a lot of code!
let’s browse through it to see the new things which we introduced here. Starting from the top, here are the interesting lines:
- the <meta name=”viewport” … HTML tag, is used for smartphones, so that the content adapts to the device’s screen
- the <style>…</style> tag and its contents: some CSS rules to define the margins and dimensions of our resulting HTML page
- the <script …> tag through which we add the googleapis.com/maps… javascript library: it includes Google Maps functionalities in your web page; please note that it is here where you have to add your API key
- in the next <script> tag:
- we define a map variable (var map;)
- we define the initialize javascript function
- we define the MapOptions javascript object to contain configuration information for our map (in the example: we set the zoom level and the type of map we want to use); more information about the MapOptions object can be found HERE
- we use the google.maps.Map object to initialize the map, and we use the document.getElementById javascript function to tell where we want the map to appear on our web page (in the example: in the DIV element with ID=”map_canvas” found below in the body of the web page)
- then we open a PHP section to query the database and obtain the info we need to create the markers
- we create a SELECT query using the SQL language and we put it in the $q variable
- we execute the query using the mysql_query command and we store the result in the $r variable
- we check if the result was obtained correctly ( using if($r) )
- we use a while loop to fetch each row of the result into the $row variable using the mysql_fetch_assoc command, which gives us a series of associative arrays
- we use the values contained in the rows to fill in the parameters of each marker, printing them out using a series of echo commands (through which we are actually injecting values coming from the DB into the HTML, using PHP)
- each marker is a separate javascript variable; to make them all different we have chosen to use a PHP variable named $i which will contain 0 for the first variable, 1 for the second one, 2 for the third, and so on (if you see, it is incremented using the $i++; command at the end of each while cycle); so the variable names for the markers will become var marker0, var marker1, var marker2 etcetera;
- each marker is initialized by using an instance of the google.maps.Marker class provided by the Google APIs
- each marker gets a series of parameters, such as position (through an instance of the google.maps.LatLng class), the map parameter which takes as a value the map we have initialized before, and a title)
- out of the cycle, the <head> section ends, and the <body> section begins with the onload=”initialize()” event handler to invoke the map initialization function as soon as the page has completely loaded.
And that’s it!
If you upload this PHP file to your web server and open up these two web pages we created (this last file and the initial HTML file with the request for geo location) on two different tabs of your browser (even on your smartphone) and you refresh first one and then the other (maybe moving a block or two between each refresh, so that you will record different coordinates) you will see the map populate with the markers describing your movements.